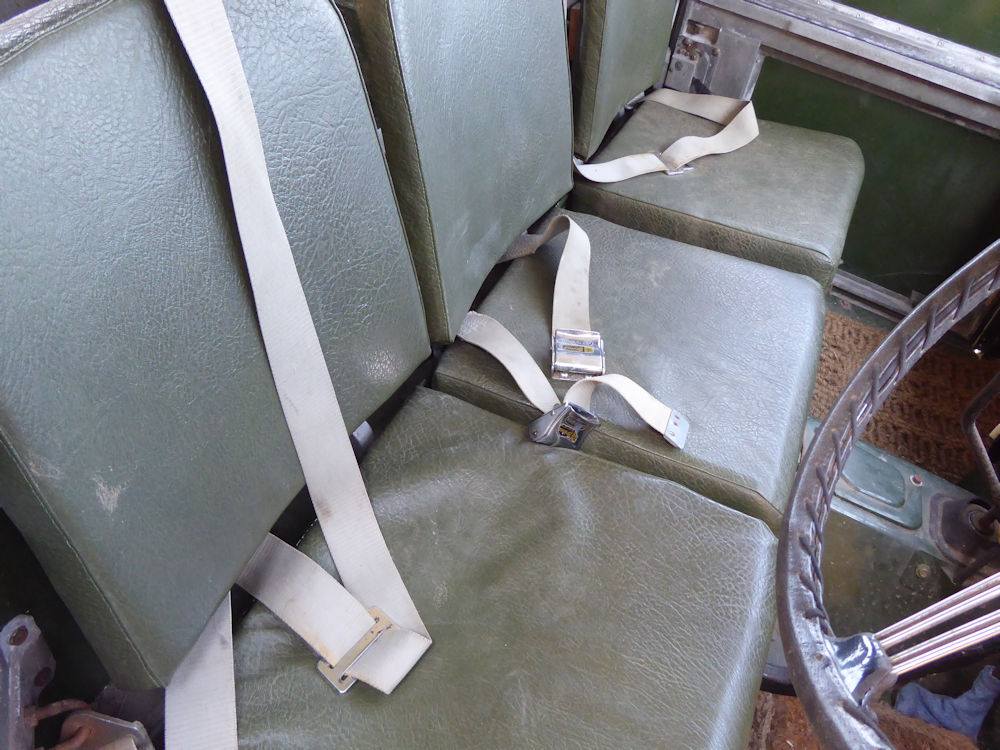
When we first acquired SXF870 over 40 years ago, the previous owner had installed simple 3-point Britax seat belts on the two outer seats. These were the type with the lift-up flap to release the belt, and which takes 2 hands to connect. They weren't totally efficient, because they simply came over the top edge of the middle bulkhead, and so didn't do much restraining of the upper body in the event of a frontal crash.
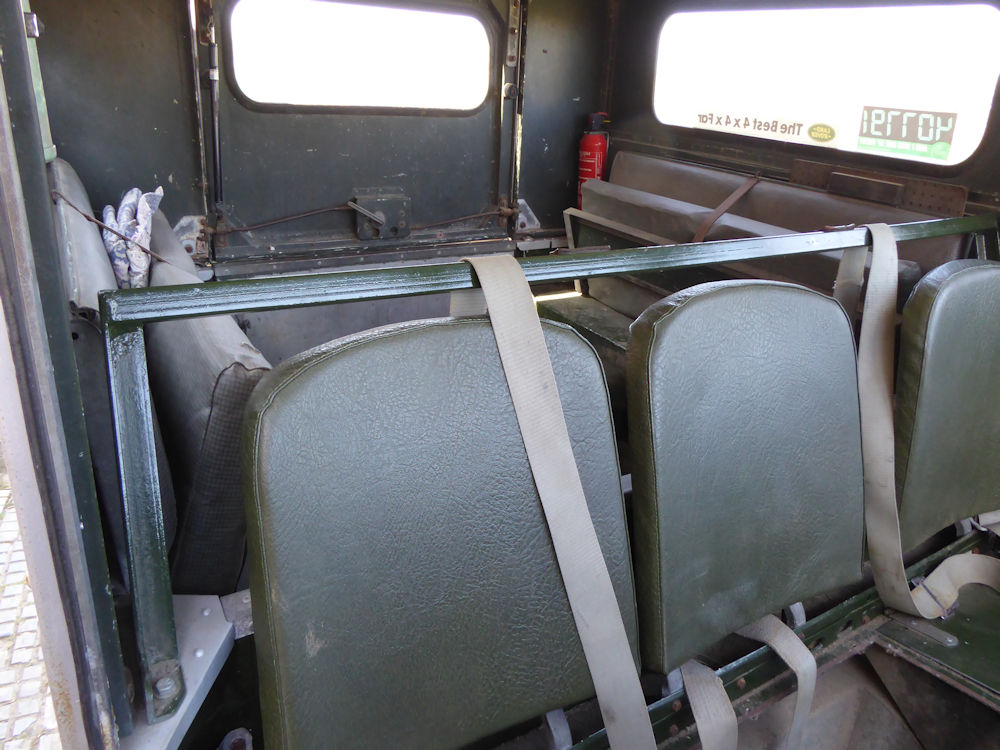
Then, when our son was born, and we needed to fit first a kiddie seat, and then a child's harness to the centre seat, I made up a strong rail above the seat backs so that all the belts could come over it, and raise the pivot point.
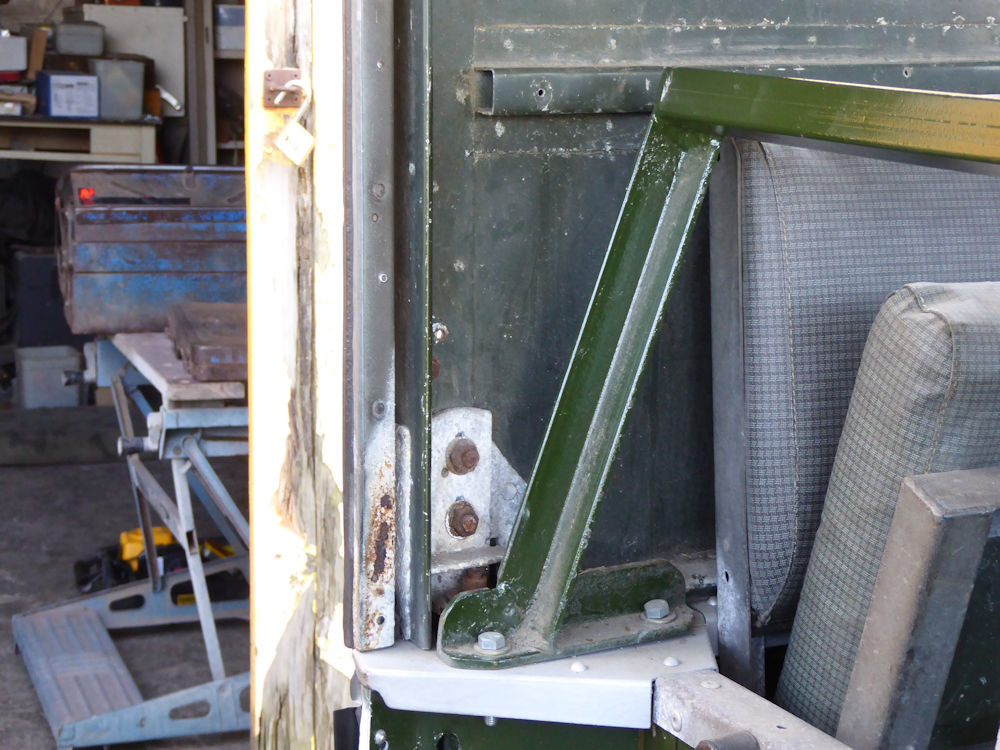
But why bother to change the Britax belts? Well, unfortunately when some work was being done to replace the back tub, the person involved wasn't entirely conscientious in replicating the mounting points, and the passenger's one (even at the absolute limit of its adjustment) was very tight indeed, and caused quite a bit of discomfort when wearing the amount of thick clothing needed in a Series 1 in a Yorkshire winter.

Many years ago I bought a set of new reel belts at a Land Rover show, and now was perhaps the time to fit them.
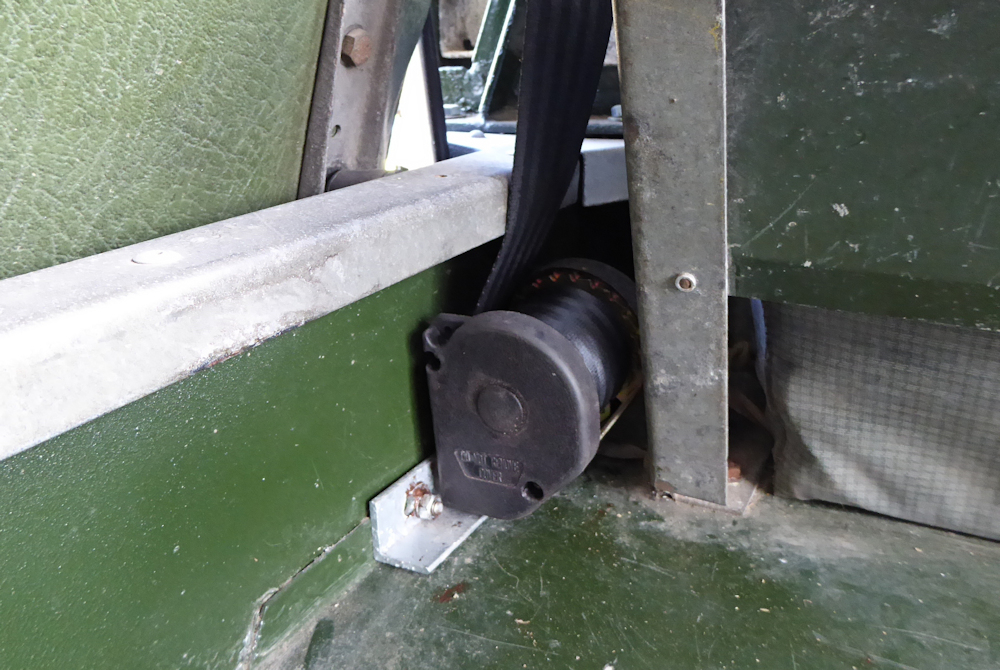
I worked out that there was just enough room for the reel in the corner behind the rear bulkhead, with a strengthening angle-iron bracket, which picked up on existing holes for the seat-back brackets. From there it was a straight upwards run for the belt over the shoulder, and the reel was upright to allow it to work properly.
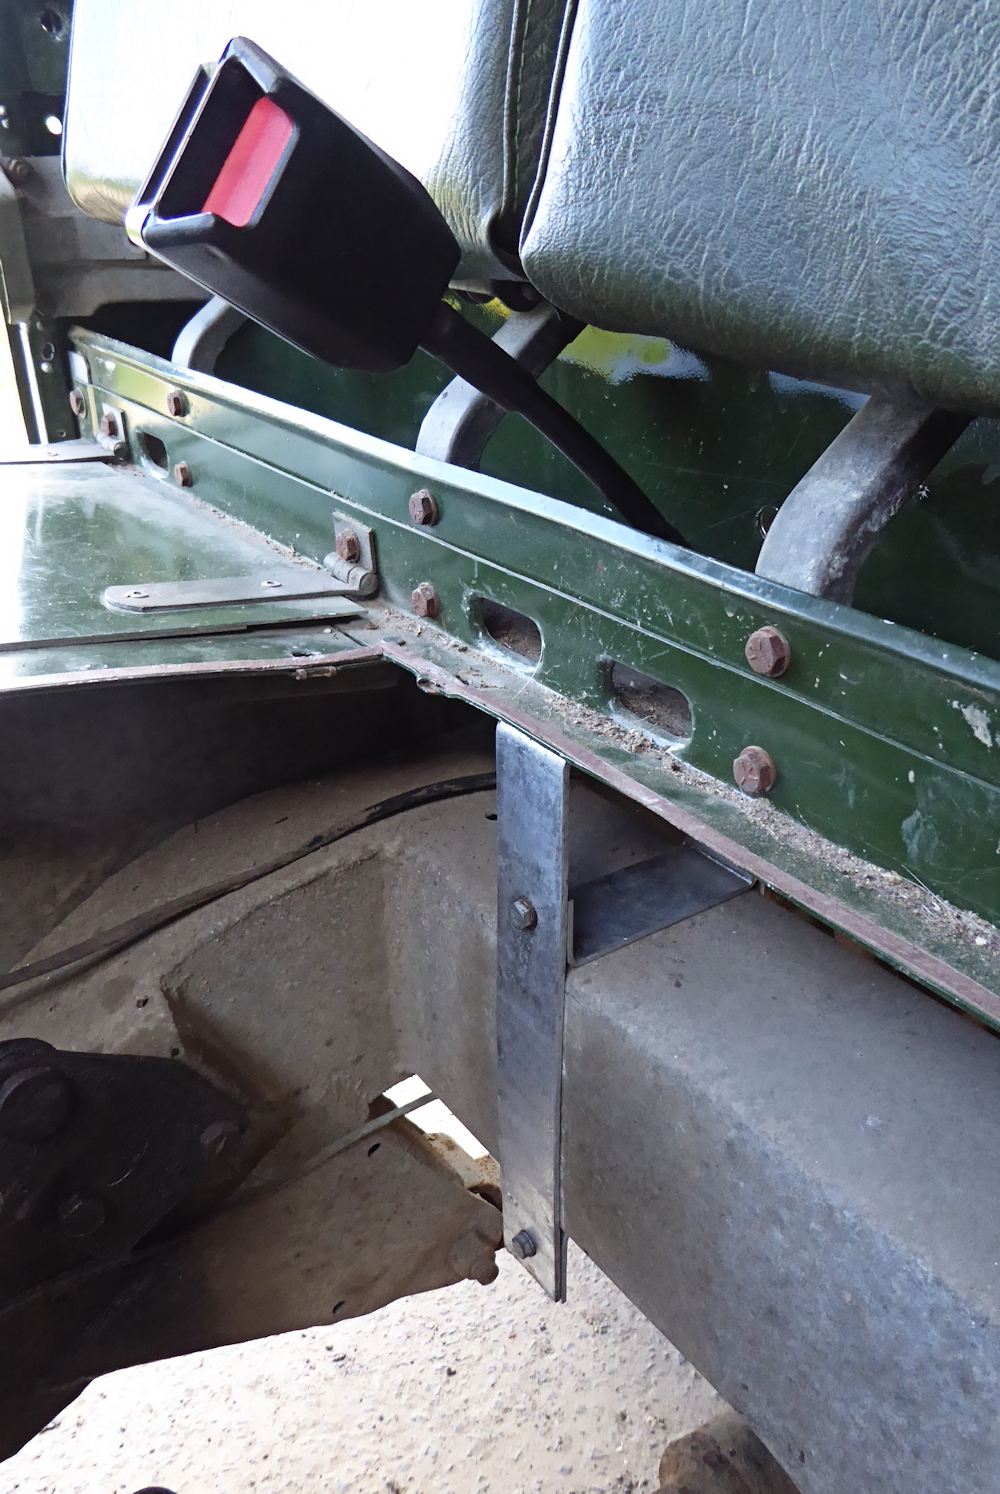
The outer end of the Britax belts had been bolted to the plate that holds the door catch, and as apparently the strongest point in that area, it was decided to use it again. That only left the fitting of the buckles on their stalks to be worked out. The trough between the seat backs and the rear bulkhead (where the starting handle lives) was the obvious place, but again there was only a single thickness of Birmabright to bolt to. Much better if a way could be devised to transmit the load down into the chassis.
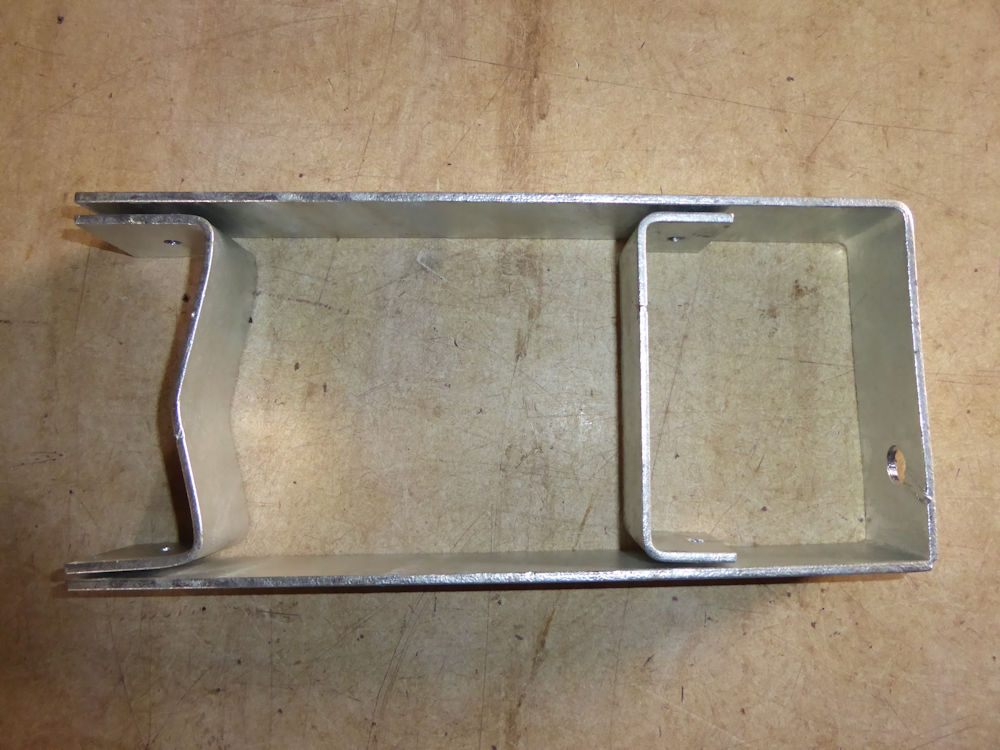
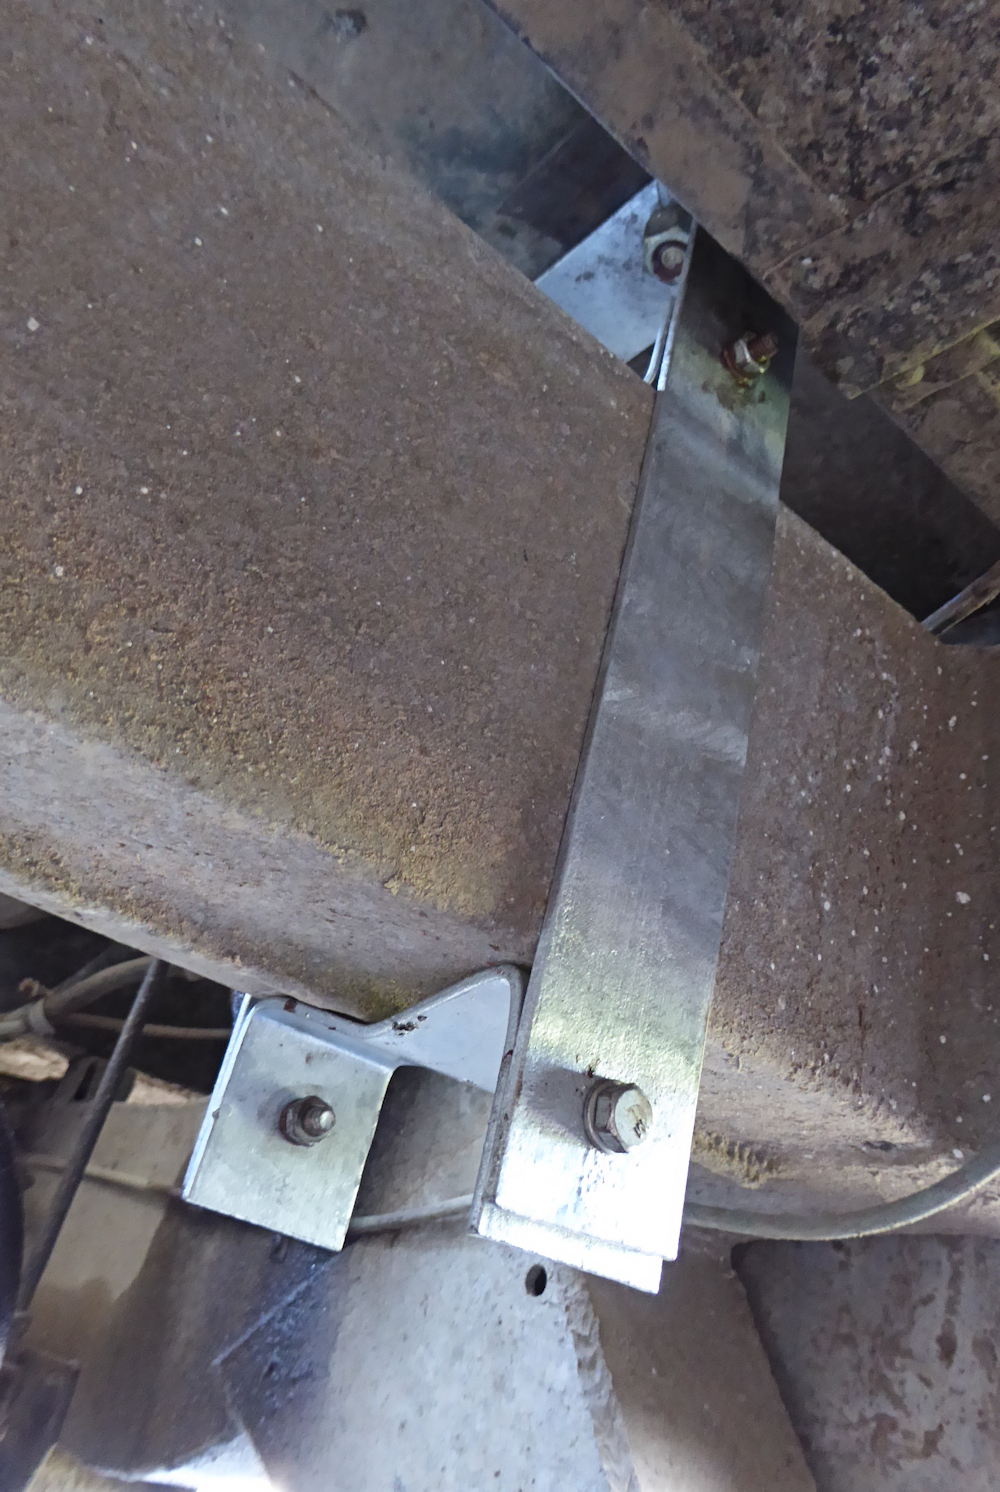
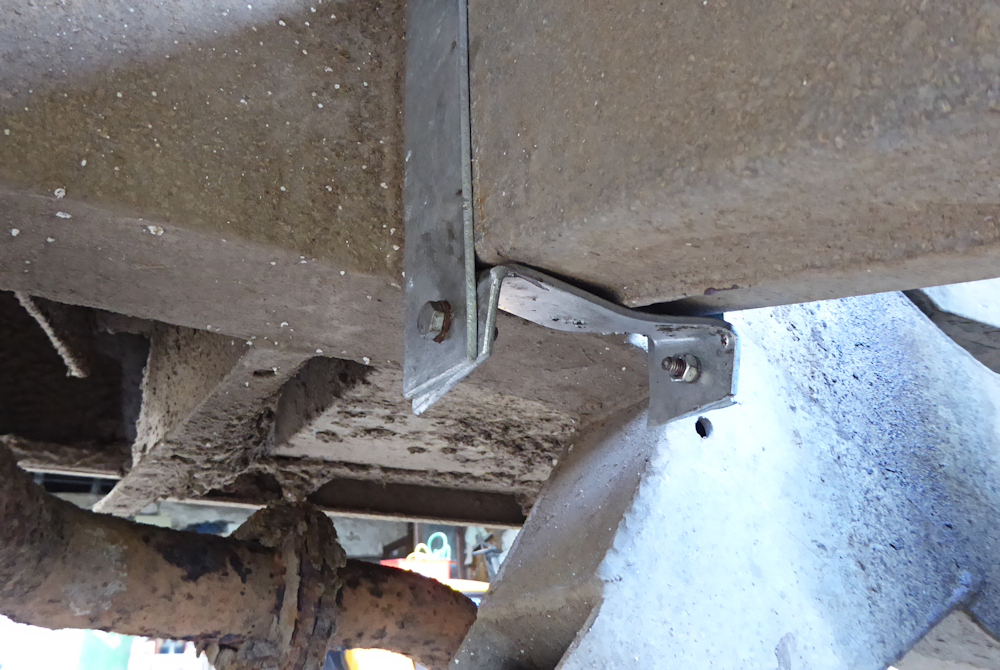
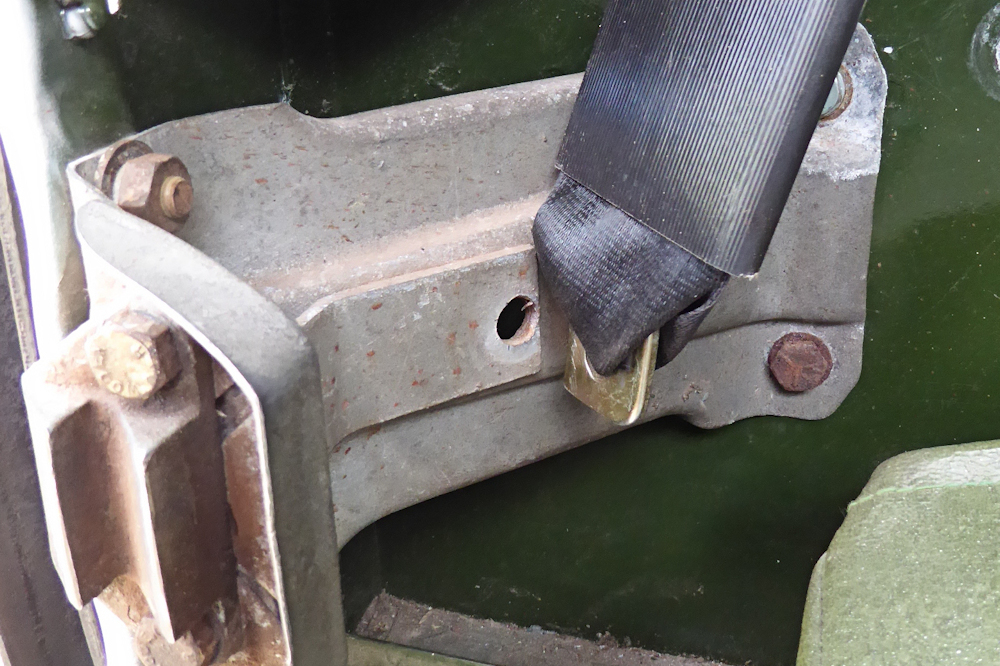
Trouble was, I had no intention of drilling holes into my new galvanised chassis, and even less of welding fixings on. The best solution would be a steel bracket that would clamp around the chassis cross-member and reach upwards to the underside of the trough, so passing any seat belt forces down into the chassis itself. The simplest way (although perhaps not the most elegant) would be to make up a long, inverted U-shaped piece that would be held up into position with smaller U-shapes bolted above and below the cross-member to retain it vertically. I bought 2 metres of strip steel, 3mm thick and 40mm wide, and cut cardboard strips to match so I could experiment. A pack of M6 nuts and bolts was found in the cupboard — on reflection, had I been buying new I would probably have used M8, or even M10.
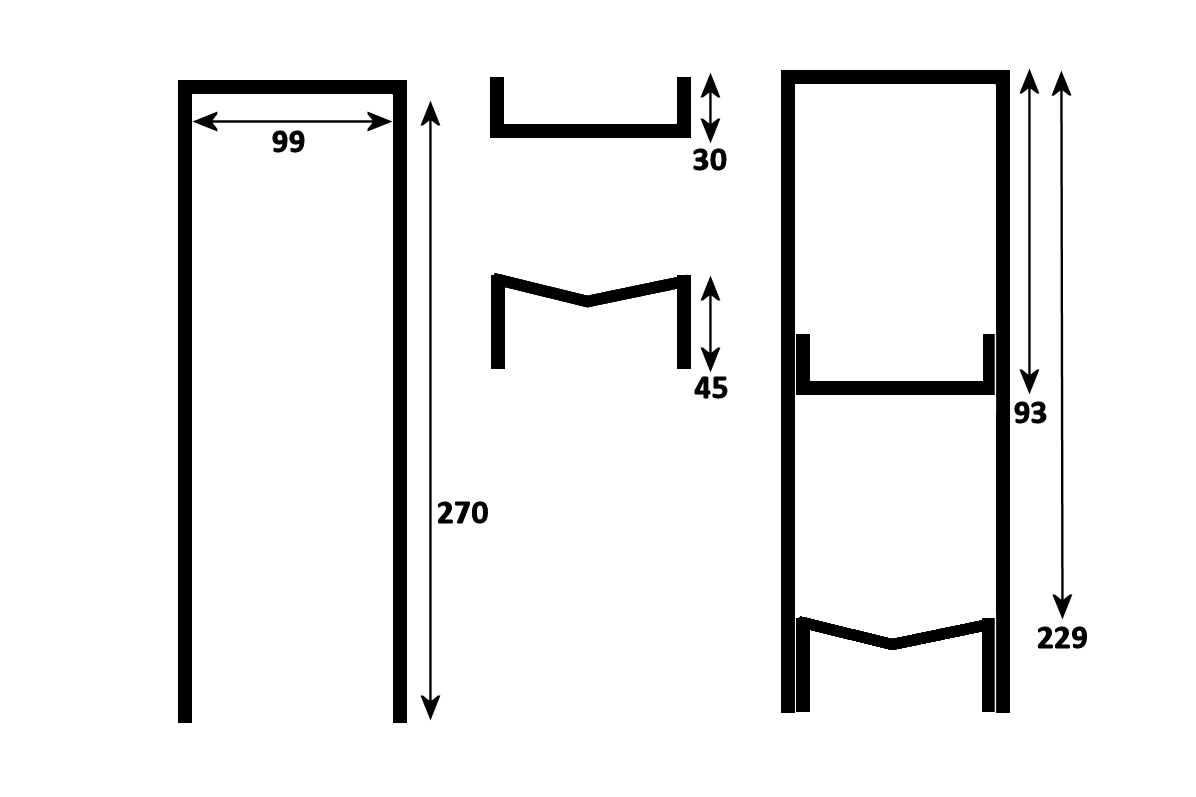
There was no pre-drawn plan — rather the metal was cut and folded in situ by trial and error. These measurements were taken afterwards from the finished pieces. There were 2 each of a long-legged U-shape, and a total of 4 shorter U-shapes to fit inside them. The long Us were offered up against the underside of the trough behind the seats, and held in place at that height by one of the smaller Us. The whole unit was then clamped to the crossmember by the lower U-shape (which was actually more of a W-shape because of the need to clear the deep seam along the underside of the crossmember. When it was all in place, the necessary hole could be drilled in the trough, and through the U bracket — in an emergency, any tension forces on the belt buckle would now go down to the crossmember, rather than just into the Birmabright. A rectangle of motorcycle inner-tube rubber was positioned between the steel and the Birmabright as an insulator.