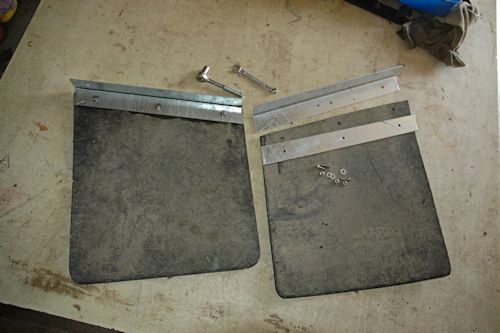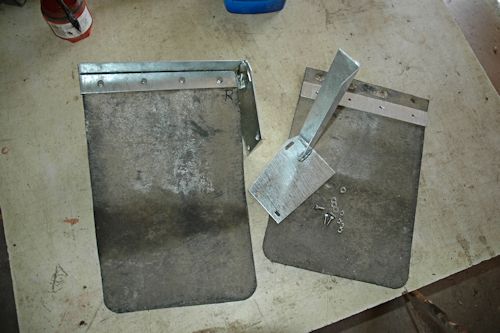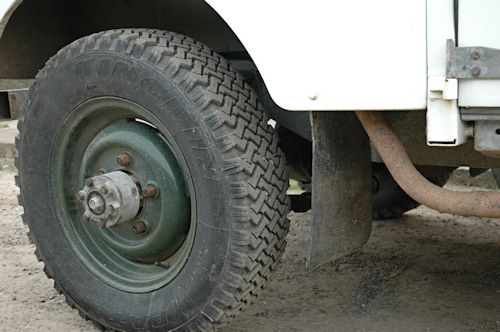
Front flap
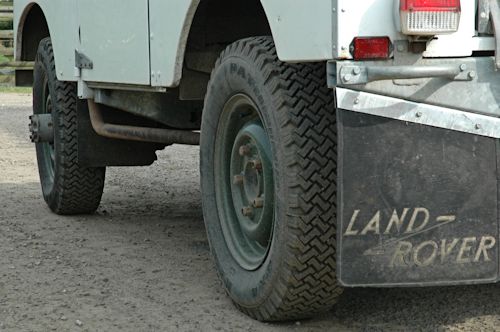
Rear flap
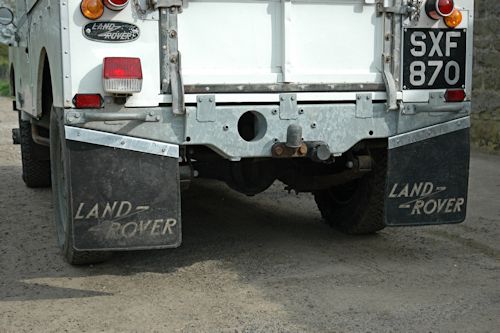
It would seem from the Forum that you either love mudflaps or you hate them. And if you love them, then you may be accused of non-originality, at least as far as Series 1s are concerned. Well, if you live where I do, you love them — down a surfaced, but always-muddy lane. And mine is a working vehicle, not a concours one, so strict originality isn’t an issue.
|
|
Ever since we bought Fido (SXF870) some 40+ years ago, she’s had flaps — not just ‘official’ rear ones with the logo on that keep the rear body and the trailer clean, but also some rather ingenious front ones. A previous owner had welded angle irons to the front of the bolt-on chassis uprights that support the steering box, and a piece of conveyor belting hanging from those not only kept the doors a bit cleaner, but also did a lot to stop mud collecting in that vertical crevice between the bulkhead footwell pressing and the wing outer.
So when Fido received her new chassis, I was anxious to re-fit them. Having shortened them a little to overcome a worn and weak point, the rear ones were simple — just some 1½-inch (40mm) steel angle, cut to shape (to allow for the slope of the rear chassis ends), pre-drilled and then galved. A smear of Waxoyl on the face of the rubber where it was sandwiched between the irons, and the whole lot could be bolted together and offered up to the chassis.
|
|
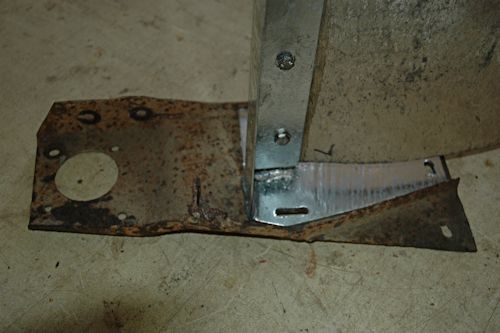
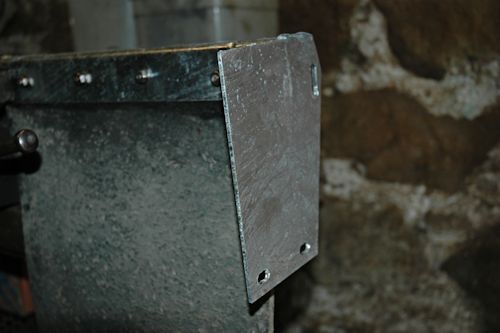
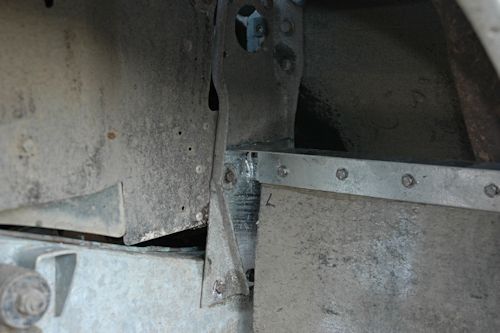
But the front ones needed a bit more cunning. I didn’t want to burn the galv off my new chassis bits by welding the angles to them, so I took one of the scrap uprights and used it as a template. At the lower end are 3 bolt holes — 2 go to the chassis rail, and the top one supports the wing inner. I cut two metal plates to sit neatly inside the ribs of the extension, and marked the slotted holes. Now I could weld my angles to those plates, knowing that they would fix in place using existing bolts, without having to drill anything. After a visit to the galv bath, the ironwork could be mated to the rubber, and the whole lot installed in about half an hour.
|
| |
|
|
The pictures possibly make it clearer. One thing to bear in mind is that the positioning of the left-hand bar must be decided first, as there’s not much clearance from the exhaust down-pipe. Once that’s been decided, make the right-hand one to match as a mirror image.
GRAEME ALDOUS
January 2016